Default Schedule - Creating a Default Schedule
You can create a default schedule that includes Employees (Core, PRN, WPS, and C/L) for each department and the Shifts that each employee normally works. You can create up to three default schedules to accommodate varying default schedule rotations,
such as: 3 weeks, 4 weeks, 6 weeks, and 12 weeks. The option to create multiple default schedules is also useful in areas with seasonal fluctuations in patient census.
There are several reasons for creating a default schedule.
- A default schedule already includes the shifts that each employee normally works or prefers to work.
- A default schedule may include mandatory weekend and holiday rotation assignments for all employees.
- A default schedule is available to copy into a new schedule, saving you the work of making manual entries in the Browse Scheduler.
To create a default schedule:
- In the main navigation bar, click Schedule > Default Schedule.
- The Default Schedule screen opens to a schedule called DEFAULT SCHEDULE 1 (the schedule may not always be blank).
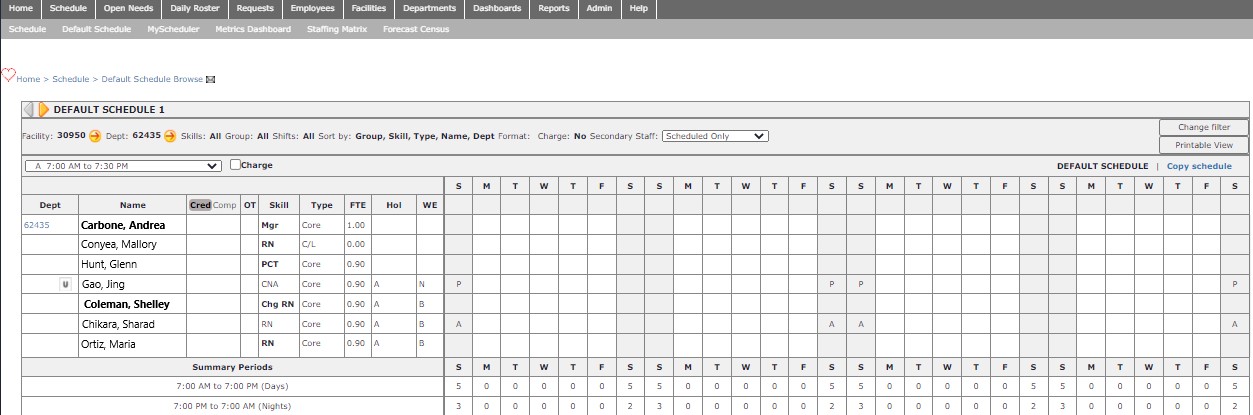
Default Scheduler Screen
- Make manual entries to add Shifts to each Employee's schedule.
- If an employee has only a partial Default Schedule, such as every other weekend, or a meeting date, enter this and complete the remaining shifts during the Self-Scheduling and Balancing phases.
- An alternative to manually entering shifts for all employees is to click the Copy Schedule link and choose from other default schedules or from the 15 most recent schedules. Once shifts are copied in, edit them manually to create
your default schedule.
Note: When copying from posted schedules, all productive, other productive, call, and placeholder shifts for all scheduled employees will be copied from the selected schedule into the default schedule.
- Click the Next arrow
 to move to DEFAULT SCHEDULE 2 or DEFAULT SCHEDULE 3.
For details about how to make manual entries and deletions, see procedures Creating a Blank Schedule and also Deleting an Assignment.
When completed, the Browse Default Schedule page becomes the default schedule template.
Summary totals for the Default schedule are not color-coded to targets.
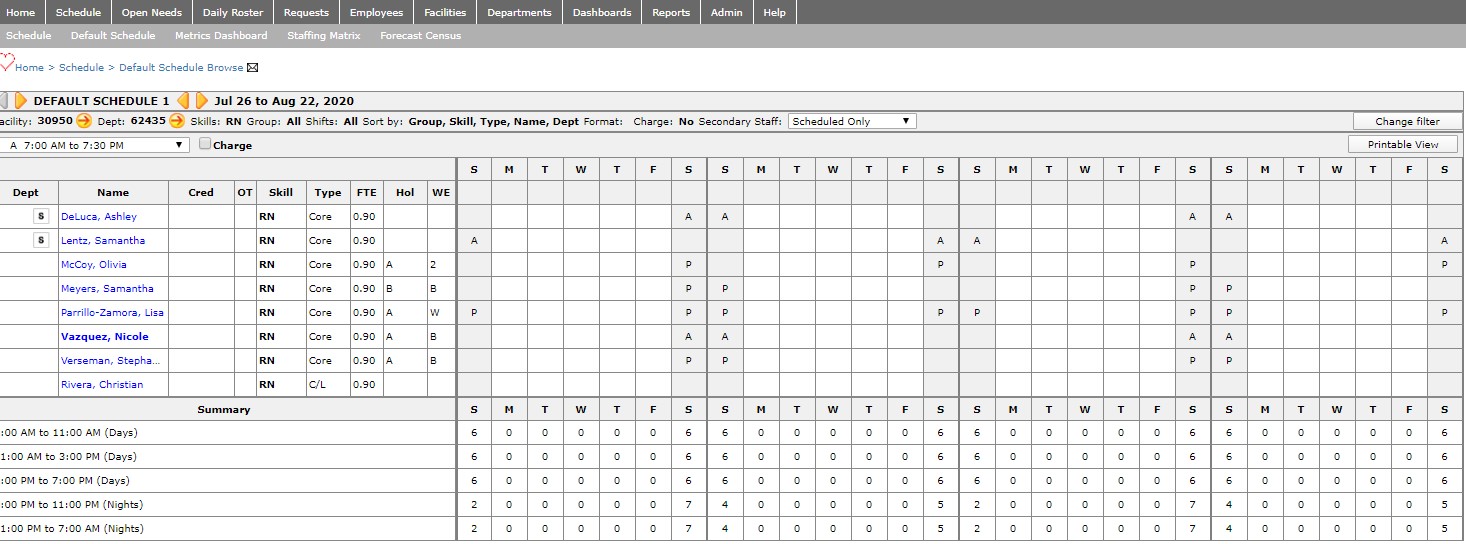
Default Schedule 1: Completed
Name, OT (overtime indicator), Cred and Skill remain fixed fields
When copying a Schedule you can:
- Copy one of up to three (3) default schedules for selected employees to a new schedule.
- Copy any of the previous fifteen (15) scheduling periods to a new schedule.
- Important Note: Non-Productive shifts and shifts for terminated employees will not be copied from the default schedule into the new schedule.