Cancellation Reasons: Create and Assign
Users: Access to this feature is limited to users assigned the PI Labor Corporate Administrator role and Cancellation Reasons - Configure permission.
Cancellation categories and reasons are managed from the Admin > Cancellation Reasons screen. Once created and associated with a division, facility and/or department, cancellation categories and reasons are
immediately available for selection when cancelling assignments and running cancellation reports.
To create a Cancellation Category:
- In the main navigation bar, click Admin > Cancellation Reasons.
- On the Cancellation Reasons screen, click Add Category.

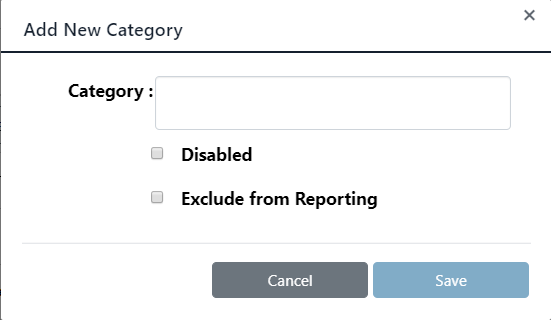
Create Category Screen with Optional Settings
- Enter a unique Category name.
- Optional settings:
- Disabled: The category and any associated reasons will not be available for selection when cancelling an assignment.
- Exclude from Reporting: The category and any associated reasons can be selected when cancelling an assignment, but will display in the Cancels Report as EXCLUDED FROM REPORTS.
- Click Save.
Cancellation reasons are grouped by category.
To create a Cancellation Reason:
- On the Cancellation Reasons screen, locate the category under which you wish to create a reason.
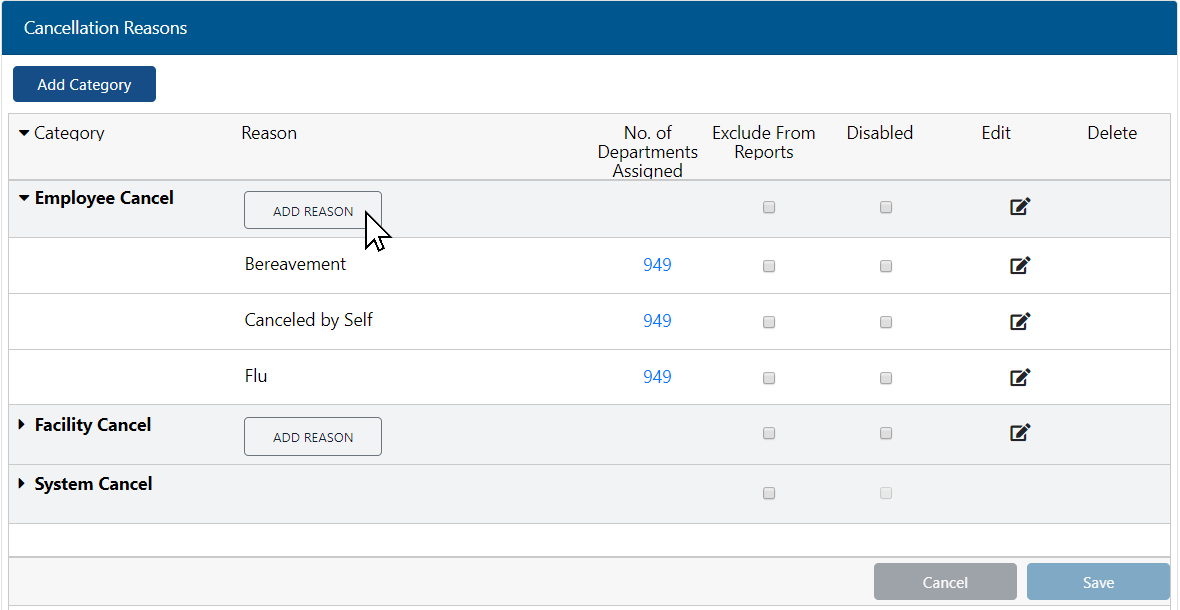
- Click Add Reason.

Cancellation Reasons Configuration Screen
- On the Add New Reason screen, enter a unique Reason name.
- Optional settings:
- Disabled: The reason will not be available for section when cancelling an assignment.
- Exclude from Reporting: The reason can be selected when cancelling an assignment, but will display in the Cancels Report as EXCLUDED FROM REPORTS.
- Click Save.
When new cancellation reasons are created, they are not available until they are enabled for use in a division, facilities, or selected departments.
To enable and assign a cancellation reason:
- On the Cancellation Reasons screen, click the number displayed in the No. of Departments Assigned column. For a new cancellation reason, this number displays as zero.
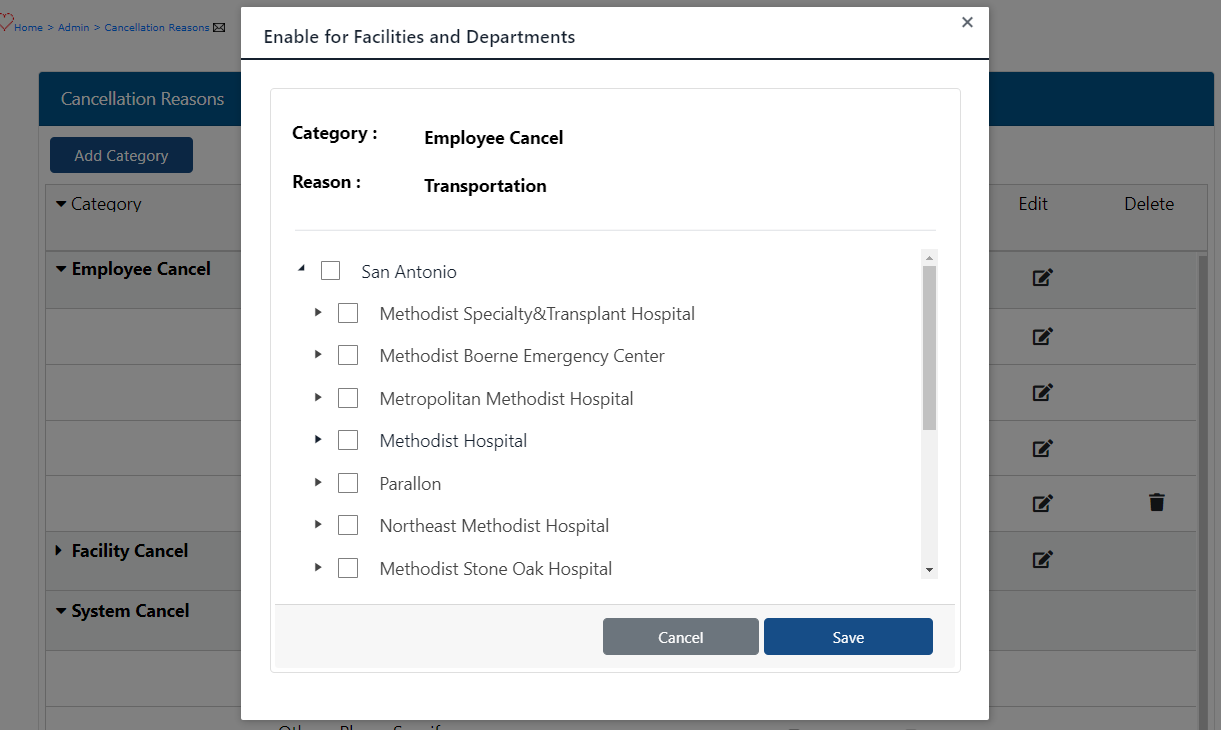
- The Enable for Facilities and Departments screen opens displaying an expandable list of options organized by Division > Facilities > Departments.

Enable for Facilities and Departments Screen
- Click the carrot next to the Division or Facility name to expand the list.
- Click the check box next to the division name to enable the reason for use in all facilities and departments.
- Click the checkbox next to a specific facility to enable the reason for use in all departments within the facility.
- You can also enable the reason for use in specific departments within a facility by expanding a facility list and selecting individual departments.
- Likewise, you can deselect facilities and/or departments to prevent them from using a cancellation reason.
- Click Save.
The number displayed in the No. of Departments Assigned column updates to reflect your selections.
Additional Information
Cancellation Reasons: Edit
Cancellation Reasons: Disable / Delete
Cancellation Reasons: Exclude from Reports
Cancellation Reasons: Standardized List
![]()
![]()


